

Using the POS and opening tables
POS Interface for Waiters (/admin/pos)
The digital POS is the control center for all hall staff. It is built to be used at maximum speed on tablets (iPad or Android) and mobile phones.
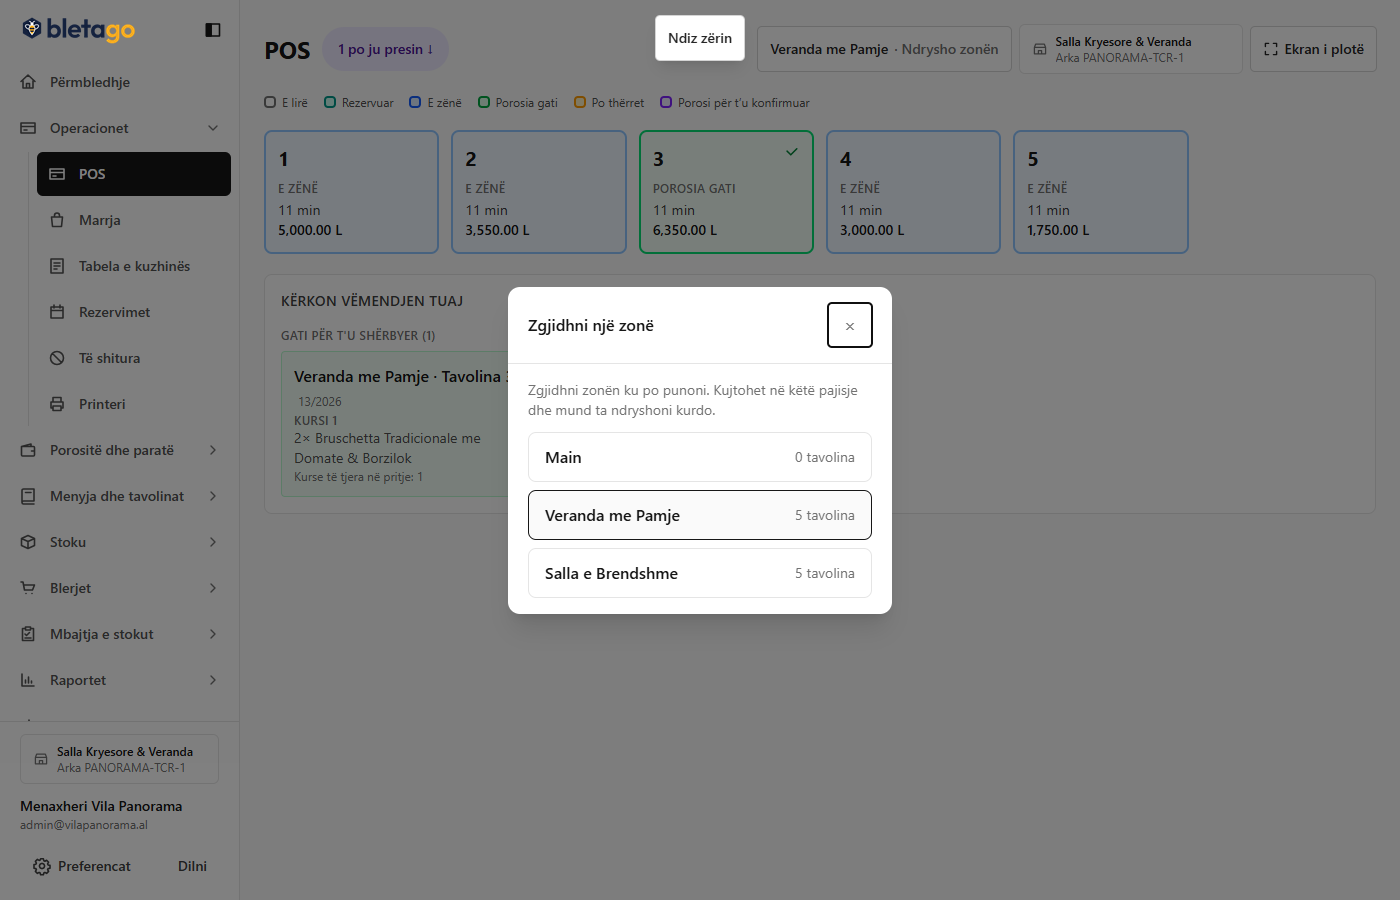
Choosing Area and View:
- Zone Selection:
- At the top of the screen you can filter the restaurant areas (e.g. Veranda with View with tables 1-5, or Inner Hall with tables 6-10).
- The selected area is automatically saved to your device's memory, so you don't need to select it again every time you open the page.
- Map vs. List Mode:
- Map (Planimetry): Displays the tables exactly according to their geometric position in the hall.
- List: Displays tables as large cards with the number of seats and length of stay.
Meaning of the Colors of the Tables on the Map:
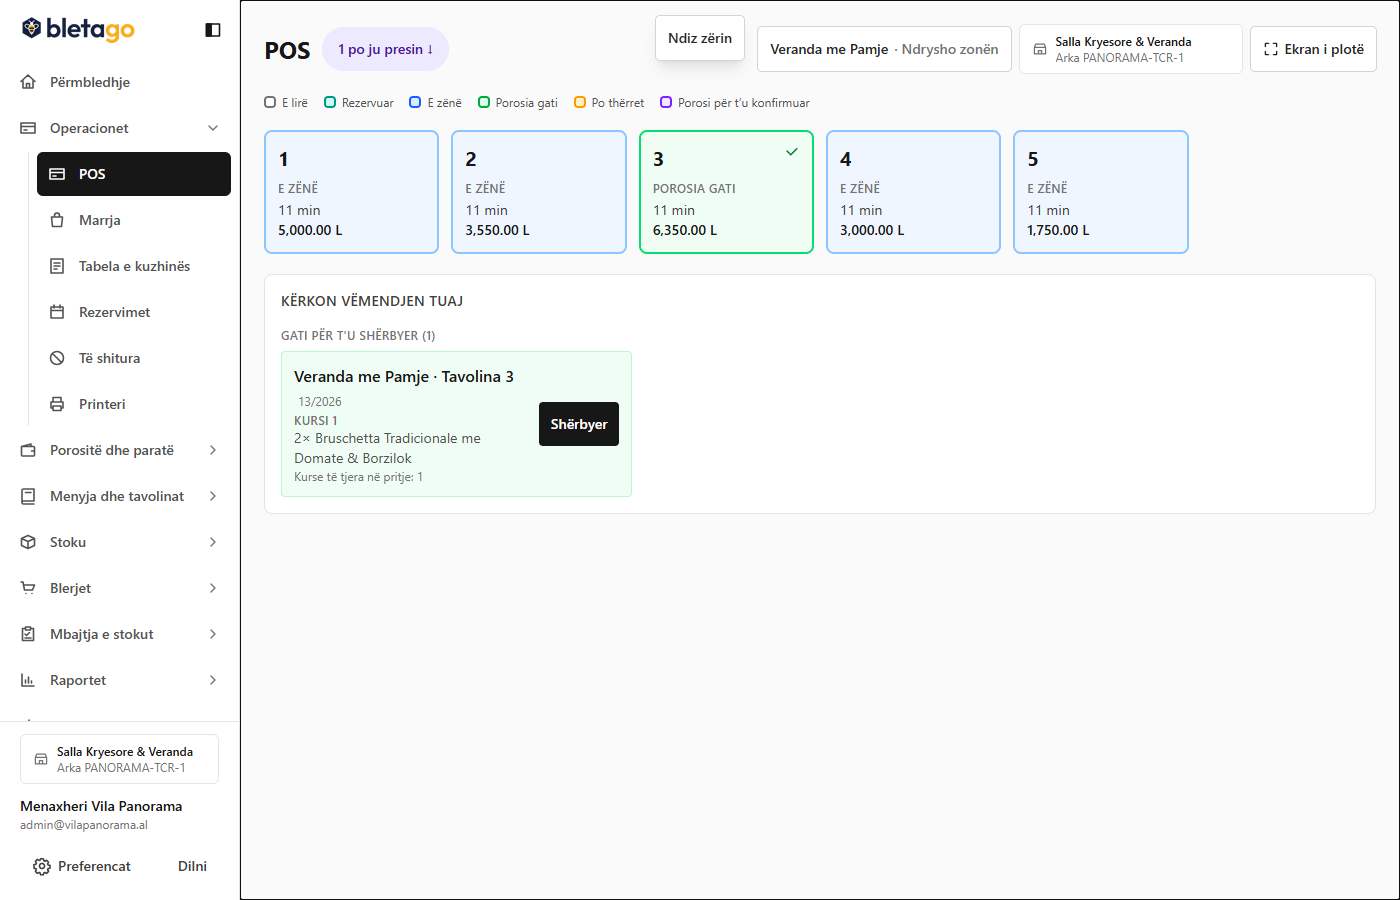
| Color / Status | What Does It Mean? | Expected Action |
|---|---|---|
| Light gray | Free (The table has no customers) | Tap the table to seat customers and start ordering. |
| Blue / Brand color | Busy (There are active orders in preparation/service) | Tap to add more articles or take courses. |
| Flashing red | Calls the waiter | The customer is asking for help on the phone! Go to the desk immediately. |
| Yellow | Requests account | The customer wants to pay! Print the summary and present the invoice. |
Opening a New Table:
- Tap a free table (e.g. Table 3).
- In the window that appears, confirm opening the session.
- The screen immediately switches to the order-taking terminal.
Tip: Use the Full Screen button in the top right corner to hide browser bars and avoid mistypes during quick service.